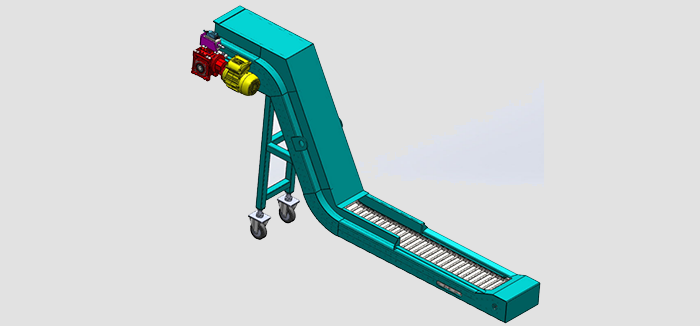
Chip Conveyor


Chip Conveyor
Chip Conveyor is designed to remove chips and debris from
coolant used in machine tool applications. The life of the SSB make Chip Conveyor can be extended
greatly by following the instructions and guidelines in this manual. For assistance in new applications or
questions regarding your System, please contact a Customer Service Representative at our Pune
manufacturing facility.
INSTALLATION AND START-UP INSTRUCTIONS
Your new Chip Conveyor has been tested and inspected prior to delivery to ensure it functions
properly upon installation. Please follow the following instructions for effective startup of your
conveyor. Please note, these instructions are helpful for manually starting & checking the independent
conveyor.
- Visually inspect the conveyor for any shipping damage. Contact us immediately if damage has occurred.
- Locate the conveyor to the desired position so that the conveyor chip chute is located under the machine coolant/chip discharge.
- If the conveyor mounted on the top of coolant tank then ensure proper leveling of coolant tank using leveling screws. After the tank is level, adjust the support wheel (or casters) of the conveyor for proper resting or support & then tighten the locknuts of leveling screws.
- Install wiring to electrical box or switch. Be sure to use the correct voltage, frequency and phase for the conveyor. Proper rotation of the conveyor belt may be obtained by reversing power connection. Ensure the motor wiring to be done by experienced technician or by professional electrician.
- Ensure, Electrical connections are taken from proper rated switch gear (MCB) and current setting is as per electrical motor. Ensure, Overload protection sensor (Limit switch) is tripping the MCB.
- Check the belt tension of the conveyor. If required, adjust tension using tension bolts and lock in place using lock nuts.
- Check the torque arm and limit switch arrangement. Ensure the gearbox holding bracket fitted firmly in-place with proper orientation. Ensure limit switch located properly to sense the overload movement.
- Before starting the conveyor it is very important to inspect the conveyor thoroughly. Isolate the conveyor from other personals & machineries. No personal to be allowed to touch the conveyor belt. No free objects, tools or any Items on conveyor belt. Make sure hands, feet, and clothing are clear of all moving parts before start-up.
- Ensure gearbox is filled with lubricant oil up to proper level.
- Make sure all drive train guarding is securely attached before start-up.
- Start the conveyor and ensure that the conveyor belt is moving in desired direction. Also ensure that the speed of the belt is as per rated rpm. If rotation direction to be made reverse then stops the conveyor, disconnect the power source before doing any correction activity.
- After ensuring the proper start of conveyor, check the sound level & movement of belt running. Usually, new belts make little more noise initially and noise reduces after few hours of running.
- Lubricate the roller chain with clean lubricant grease or oil.
- Contact your CNC system manufacturer if you need to interface the conveyor On/Off sequence.
Note: The conveyor should be set up to run continuously while machine tool is discharging metal scrap &
coolant. Unusually high amounts of metal scrap during a short period of time can result in jamming the
conveyor.
CAUTION:
KEEP HANDS, FEET, AND CLOTHING CLEAR OF
MOVING PARTS OF CONVEYORPERFORMING ANY
MAINTENANCE
Scheduled Maintenance Procedures
Daily Maintenance:
- Check the charging area of conveyor before starting the machine. Ensure no tools, jobs or any other solid objects placed over conveyor belt (other than metal scrap / chips).
- Check the outlet of conveyor. It should be free from foreign objects.
- Ensure limit-switch is in proper position.
- Check chip bin and empty it if filled.
Monthly Maintenance:
- Check tension of conveyor “hinge/scraper belt” by checking the torque setting of the “adjusting screws” for the “take-up bearings” on each side of the head.
- The “current sensor” is set at the factory. Adjustment of current sensor may compromise motor protection.
- Insert 1-3 shop rags in the discharge of the conveyor to run through the bottom in an effort to clean out any chips. Repeat if necessary. Caution: Do not stick hands into harm’s way of conveyor belt – avoid pinch points.
Quarter yearly maintenance (once in three months).
- Grease “take-up bearings” with grease gun. Do not over grease – seals can be damaged.
- Inspect “hinge/scraper belt” for wear or damage. (See Hinge/Scraper Belt Removal and installation Procedure if necessary)
CAUTION:
ALWAYS DISCONNECT POWER BEFORE
PERFORMING ANY MAINTENANCE
Belt Removal, Maintenance, and Installation
Chip Conveyors are typically equipped with either a “hinge belt” or “scraper belt” dependent
upon the specific application. The “scraper belt” is wide open for viewing of critical components so
maintenance requirements are easily seen. On the other hand, inspection of the “hinge belt” can be
somewhat more difficult. General inspection of either belt type can be accomplished at the discharge
opening at the head of the conveyor, by removal of the slide lid, or through openings in the trough.
Detailed inspection of a “hinge belt,” however, requires complete removal of the belt from the conveyor
body to provide complete access to all the integrated components.

 Facebook
  Whatsapp
  Linkedin
  Instagram